Creating your First Uno Platform Application


Setting up your development environment
- Visual Studio 2022 (Windows)
- Visual Studio for Mac (macOS)
- Visual Studio Code (Windows; macOS; Linux (.NET 6.0 SDK or later))
- JetBrains Rider (Windows; macOS; Linux (v 2020.2; Xamarin Android Support Plugin))
- Codespaces (Windows, macOS, Linux)
- GitPod (Windows; macOS; Linux)
Uno Platform on Visual Studio Code
For further info on how to create Uno Platform applications with Visual Studio Code, read on here.
Uno Platform on Visual Studio Community
For creating Uno Platform applications, you'd need Visual Studio 2022 version 17.33 or later. In your Visual Studio Installer, you will need the following workloads installed:
- ASP.NET and the web
- .NET Multi-platform App UI development
- .NET desktop development
- Universal Windows Platform For further info on how to create Uno Platform applications with Visual Studio 2022, read on here.
Setting up your Uno Platform environment
Open up your command prompt or Terminal:
dotnet tool install -g uno.check- To install the Uno Platform tool.dotnet tool update -g uno.check- To update the tool, if you already have an existing one.uno-check- To run the tool and confirm that everything is working as it should. The following steps is for installing and creating your project with Visual Studio Code:dotnet new -i Uno.ProjectTemplates.Dotnet- To install the Uno.ProjectTemplates package. Doing this we see the templates that we have installed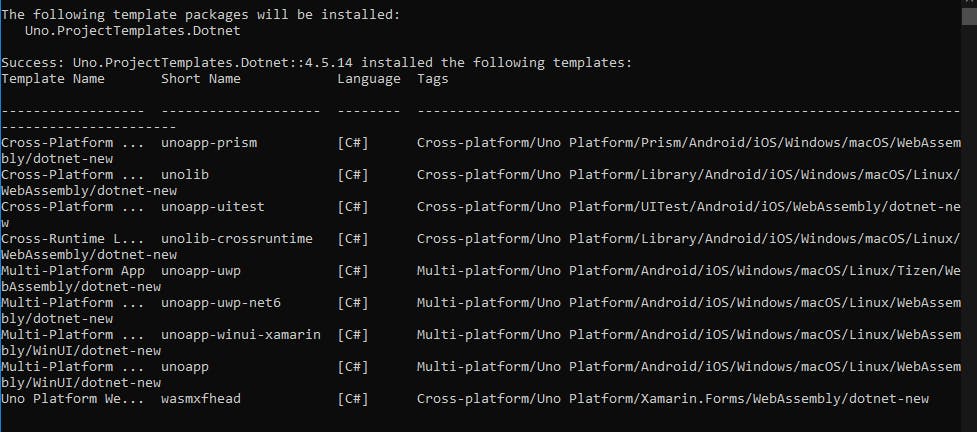 Depending on the templates available to you, you create your required template for your specific project requirement.
dotnet new unoapp -o YourAppName- To create our new Uno Platform app, I so named YourAppName.- If you are new to Visual Studio Code, from your terminal, to open your created Project, type the following:
code ./YourAppName. With Visual Studio 2022, to create your Uno Project the following steps are needed: - Once you launched your Visual Studio 2022, click Continue without code, click Extensions --> Manage Extensions from the Menu Bar.
- Next, in your Online node, search for Uno Platform Solution Templates, this is the extension that will enable you to create Uno Platform applications.
- Once done, restart Visual Studio.
Create a Simple Uno Platform Application with Visual Studio 2022
We are going to demonstrate a few features, that we should already know if we have created UWP applications before. We will create TextBlock, a Button (or three) and brighten with some color.
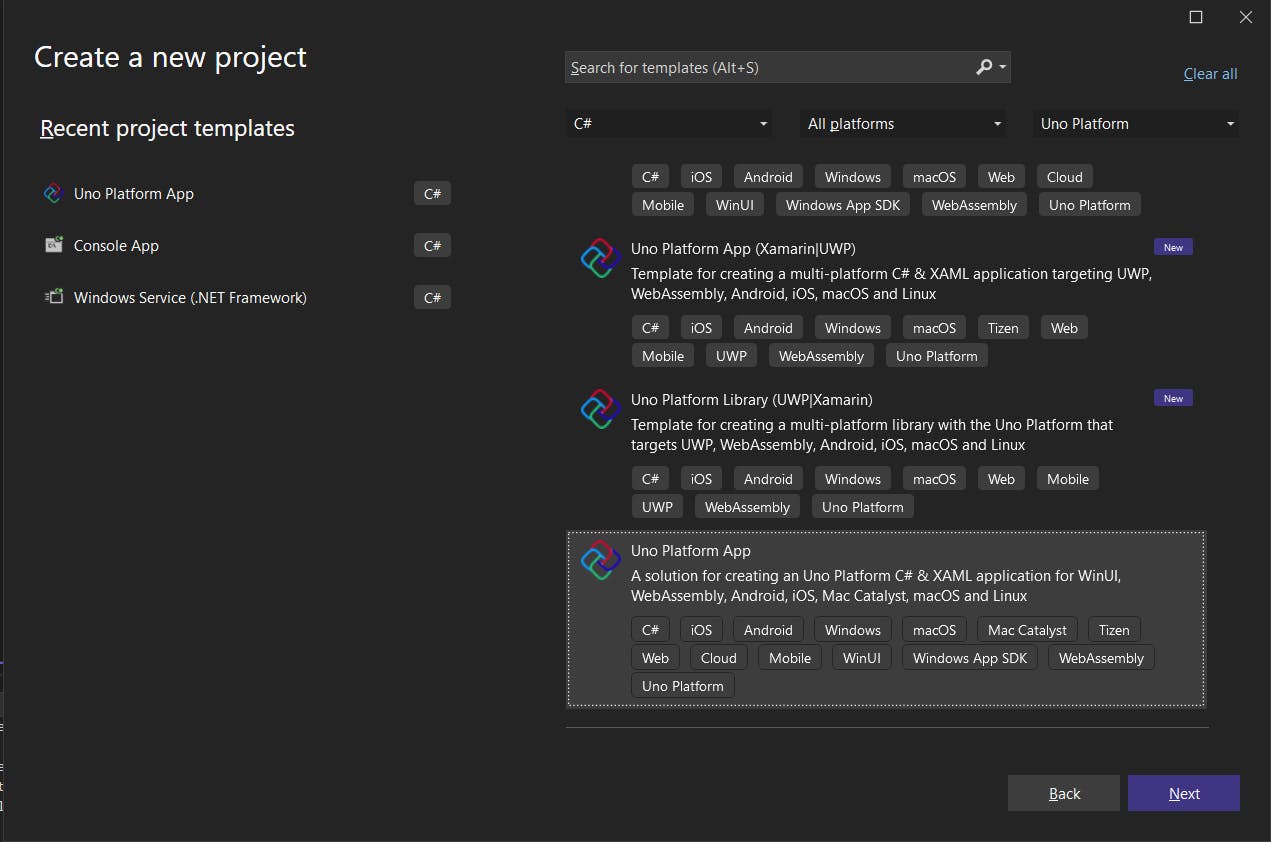
- Start with creating a new Uno Platform Project.
- Select the Uno Platform App project template. Click on Next.
- Name the Project as ChangeScene in your chosen project folder. Click on Create.
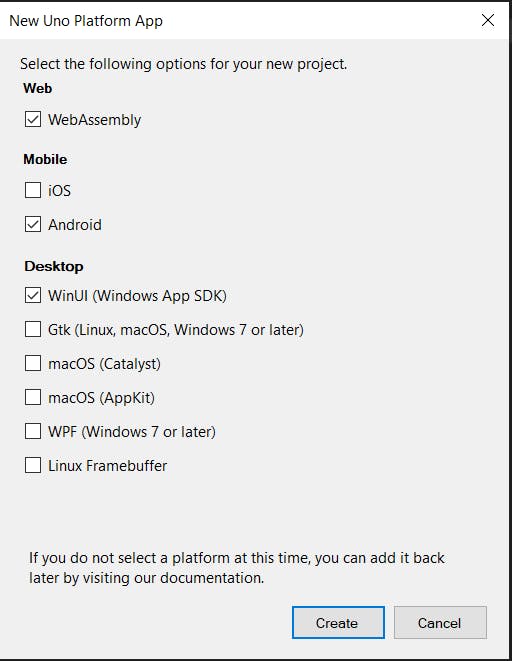
- Then on the New Uno Platform App window, you select what options you are creating your project for. I've selected for Web, Android and Windows, since I have limited Mobile emulators. Click Create.
 Now, we should have a Platforms folder, which houses our other templated projects. You will notice each template project pretty much mirrors each other. We will, however, be doing most of our work within the
 ChangeScene.Sharedproject. Always remember, whatever changes you want to make to your project, be it a Web project or your Mobile App project, you make those changes within yourSharedproject. - By default, our template MainPage.xaml has a
TextBoxwith the TextHello, world!. - Let's change that
TexttoChange My Theme!. Now, before we continue any further, let's Debug our application. To debug and run the Windows head of your Uno project, the following steps as as required: - Right-click on ChangeScene.Windows project, select Set as startup project.
- Select the Debug|x86 configuration.
- Press the ChangeScene.Windows button to deploy the app. Make sure you have Developer Mode enabled. To run the WebAssembly (WASM) head of your Uno project, the following steps as required:
- Right-click on the ChangeScene.Wasm project, select Set as startup project.
- Press the ChangeScene.Wasm button to deploy and view your app on the browser. To debug and run the Mobile head of your Uno project, the following steps as required:
- Right-click on the ChangeScene.Mobile project, select Set as startup project.
- In the "Debug toolbar" drop down, select your available framework, which can be whatever emulator or attached device you have available.
Adding more to our Project
Change Application's Theme When we ran our ChangeScene project application, we see the defaulted Light Theme. Let's change that to Dark.
Open the App.xaml file. Type the following:
RequestedTheme="Dark"as shown below.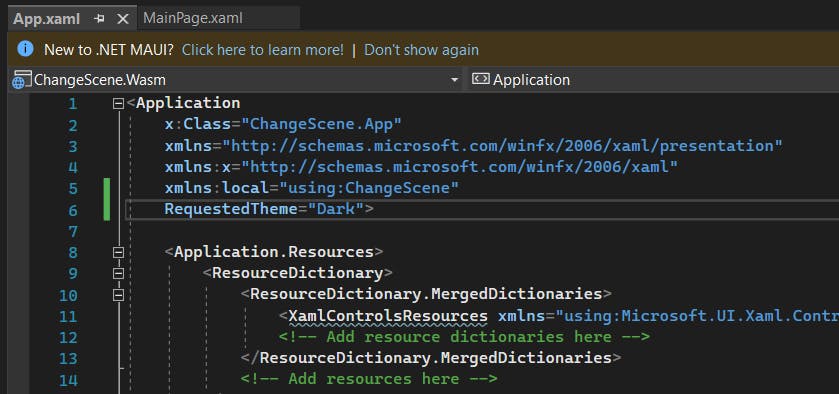
Add the following code into the MainPage.xaml. Here we are displaying a Grid with two rows and one column. I will not be going into details about XAML, as that should be a separate tutorial on its own, and I'm to assume you should know how to create any application in Visual Studio and know C# or VB.NET and XAML.
<Grid> <Grid.RowDefinitions> <RowDefinition Height="Auto"></RowDefinition> <RowDefinition Height="*"></RowDefinition> </Grid.RowDefinitions> <Grid.ColumnDefinitions> <ColumnDefinition Width="*"></ColumnDefinition> </Grid.ColumnDefinitions> </Grid>- Next we add a
TextBlockand threeButtons, inside theGridand after theGrid.ColumnDefinitions.<TextBlock Text="Change My Theme!" Margin="20" FontSize="30" HorizontalAlignment="Center" /> <StackPanel Grid.Row="1" Orientation="Horizontal" HorizontalAlignment="Center" Margin="5"> <Button Content="Green" Background="#367E18" Foreground="#FFE9A0" /> <Button Content="Blue" Background="#0008C1" Foreground="#FDF0E0" /> <Button Content="Clear /> </StackPanel>
I will end things here, as here I was to walk you through the steps of starting out with an Uno Platform application. I will continue this in another blog post later on. You can find the complete code for this sample demo here.